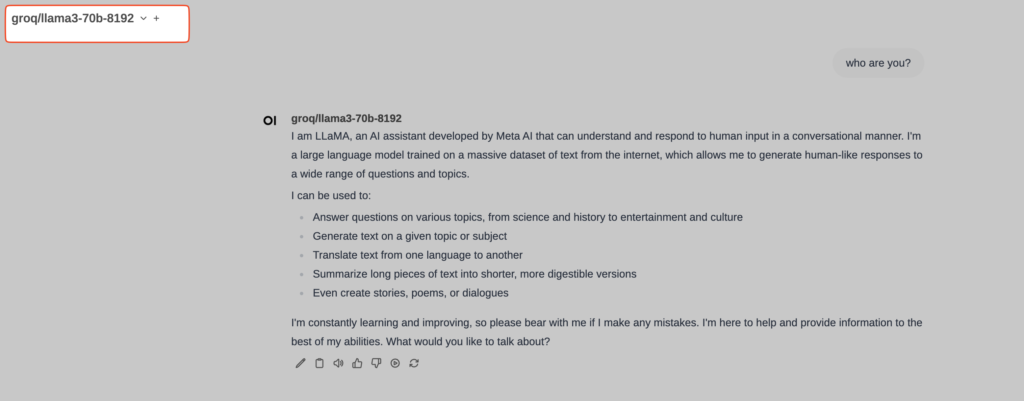
Monitorizando logs de LLMs con litellm y langfuse

Contexto: has implementado o estás usando una aplicación web que internamente hace llamadas vía API a un LLM (GPT, Claude, LLama, whatever). Quieres analizar cuáles son los prompts que dicha aplicación está enviando. Necesitarás litellm (para que haga de proxy entre tu aplicación y el LLM) y langfuse, que recibirá un callback y te mostrará gráficamente todos los prompts. La idea es que litellm enviará automáticamente a langfuse una copia de cada lllamada al LLM (y de su respuesta) para que luego las puedas visualizar cómodamente.
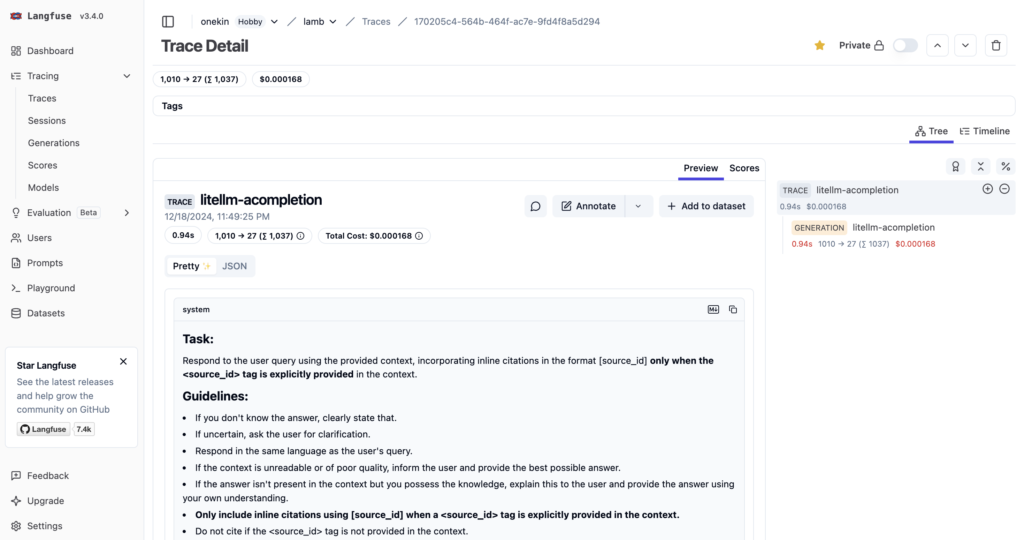
Receta rápida:

Instala las dependencias necesarias

$ pip install litellm 'litellm[proxy]' prisma langfuse

Usa el fichero de configuración de litellm del que ya hablamos en su día en ikasten.io.

Instala Postgresql, por ejemplo, a través de docker. Para ello, usa el siguiente docker-compose.yaml:

version: '3'
services:
db:
image: postgres
restart: always
environment:
POSTGRES_DB: litellm
POSTGRES_USER: llmproxy
POSTGRES_PASSWORD: dbpassword9090
healthcheck:
test: ["CMD-SHELL", "pg_isready -d litellm -U llmproxy"]
interval: 1s
timeout: 5s
retries: 10
ports:
- "5432:5432"

(cambia el password dbpassword9090 como quieras). Postgresql es necesario para que litellm guarde información de los modelos. Necesitarás también crear un schema para postgresql a través de Prisma.

Copia el fichero schema.prisma del repositorio GitHub de litellm:

https://github.com/BerriAI/litellm/blob/main/schema.prisma

$ prisma generate

Lanza litellm :

$ DATABASE_URL="postgresql://llmproxy:dbpassword9090@localhost:5432/litellm" STORE_MODEL_IN_DB="True" LITELLM_MASTER_KEY=sk-12345  LITELLM_SALT_KEY="saltkey1234" litellm --config ./config.yaml 

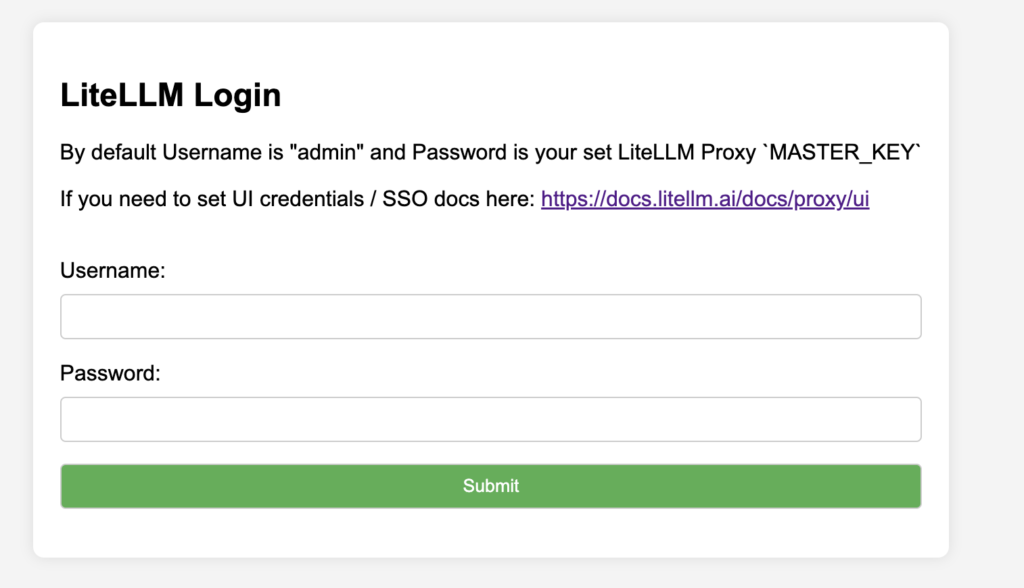
Abre el panel de administración gráfica de litellm en localhost:4000/ui

Por defecto, login: admin, pass: el master_key que hayas definido. En el ejemplo: sk-12345.
Pulsa en Logging&Alerts -> Add Callback
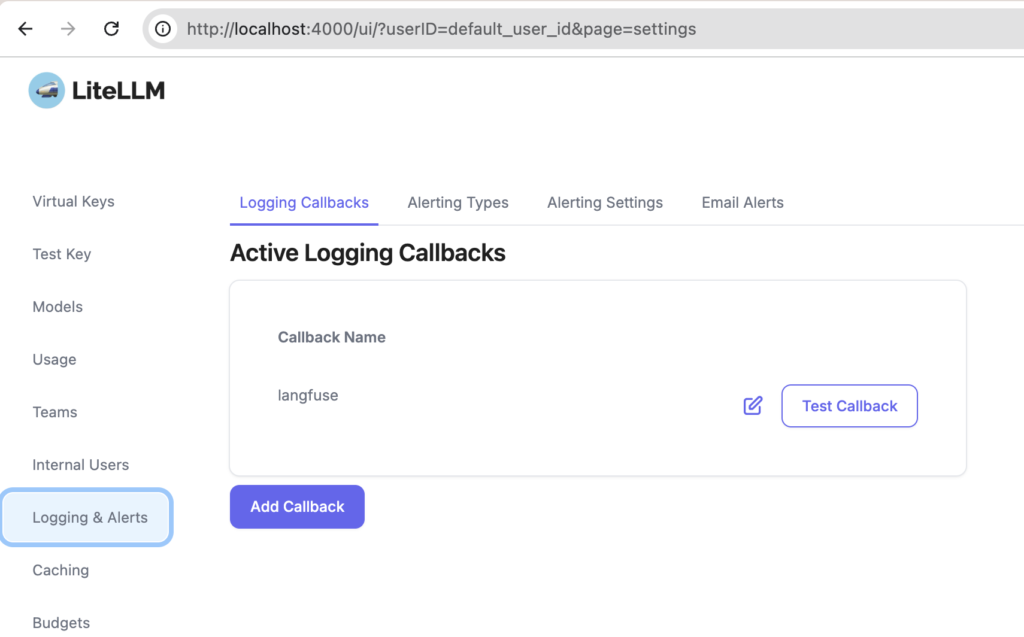
Elige langfuse y a continuación, teclea los parámetros indicados:
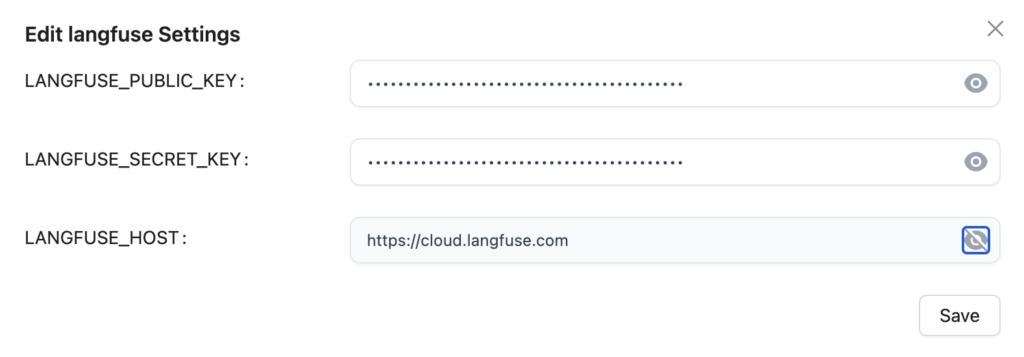
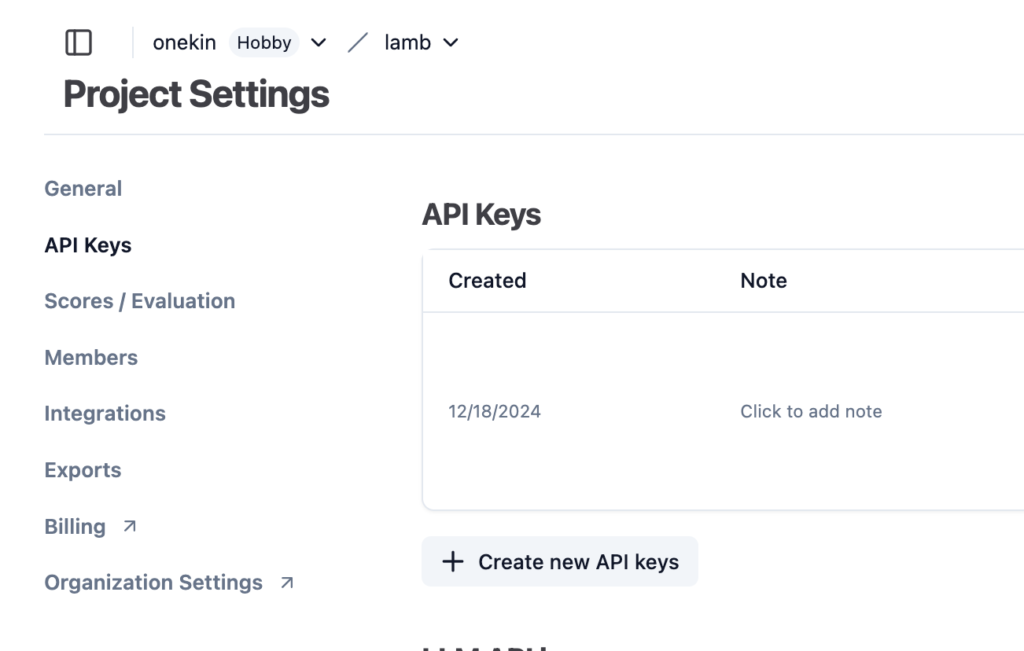
Puedes obtener el public_key y secret_key creando una cuenta gratuita en langfuse. https://cloud.langfuse.com/

Crea un proyecto y obtén los api keys:
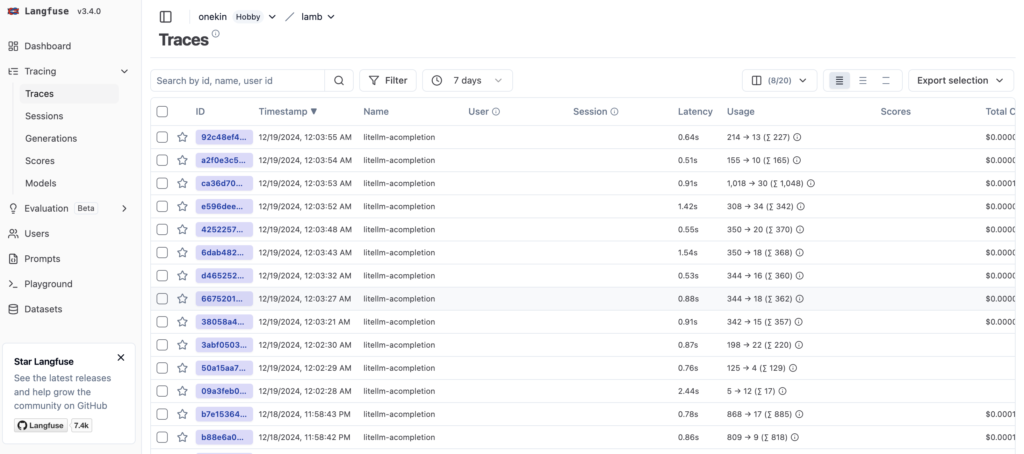
Prueba a pulsar en el Test Callback y deberías ver a los pocos segundos una nueva entrada de test en los logs de langfuse:
Más info:

https://robert-mcdermott.medium.com/centralizing-multi-vendor-llm-services-with-litellm-9874563f3062
OpenWebUI-LiteLLM integration

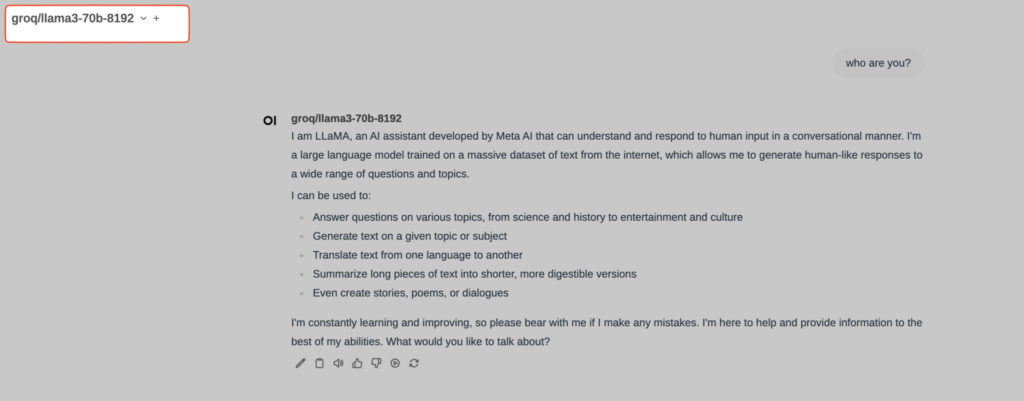
LiteLLM is a package that simplifies API calls to various LLM (Large Language Model) providers, such as Azure, Anthropic, OpenAI, Cohere, and Replicate, allowing calls to be made in a consistent format similar to the OpenAI API. Integrated with OpenWebUI, it allows this user interface to work with any LLM provider. In my case, I use OpenWebUI+LiteLLM to query groq/llama3-70b, Anthropic Claude Opus 3, GPT-4o, and Gemini-1.5-pro, among others.

The problem is that the 0.2.0 release of OpenWebUI stopped integrating a version of LiteLLM. That doesn’t mean it can’t be used; rather, LiteLLM needs to be launched separately, through a Docker container, for example.

Let’s launch LiteLLM:

$ docker run -d --name litellm -v $(pwd)/config.yaml:/app/config.yaml -p 4000:4000 -e LITELLM_MASTER_KEY=sk-12345 ghcr.io/berriai/litellm:main-latest --config /app/config.yaml --detailed_debug

That command launches LiteLLM listening on port 4000, using config.yaml as the configuration file. The config.yaml file might look something like this (don’t forget to input your API Keys):

general_settings: {}
litellm_settings: {}
model_list:
  - model_name: claude-3-opus-20240229 # user-facing model alias
    litellm_params:
      api_base: https://api.anthropic.com/v1/messages
      api_key: sk-
      model: claude-3-opus-20240229
  - model_name: gpt-4-turbo 
    litellm_params: 
      api_base: https://api.openai.com/v1
      api_key: sk-
      model: gpt-4-turbo
  - model_name: gpt-4-vision-preview 
    litellm_params: 
      api_base: https://api.openai.com/v1
      api_key: sk-
      model: gpt-4-vision-preview
  - model_name: gpt-4o 
    litellm_params: 
      api_base: https://api.openai.com/v1
      api_key: sk-
      model: gpt-4o-2024-05-13
  - model_name: gpt-3.5-turbo 
    litellm_params: 
      api_base: https://api.openai.com/v1
      api_key: sk-
      model: gpt-3.5-turbo
  - model_name: gemini-1.5-pro
    litellm_params:
      api_key: AI-
      model: gemini/gemini-1.5-pro
  - model_name: groq/llama3-70b-8192
    litellm_params:
      api_key: gsk_
      model: groq/llama3-70b-8192
router_settings: {}

Now, from OpenWebUI, go to Settings/Connections and enter http://host.docker.internal:4000/v1 in the host field and sk-12345 (or the key you set for LiteLLM when you launched it via Docker) in the API-Key field.

OpenWebUI: integración con LiteLLM

LiteLLM es un paquete que simplifica las llamadas a API de varios proveedores de LLM (Large Language Model), como Azure, Anthropic, OpenAI, Cohere y Replicate, permitiendo realizar llamadas en un formato consistente similar al de la API de OpenAI. Integrado con OpenWebUI permite usar este interfaz de usuario contra cualquier proveedor LLM. En mi caso, uso OpenWebUI+LiteLLM para hacer consultas a groq/llama3-70b, Anthropic Claude Opus 3, GPT-4o y Gemini-1.5-pro, entre otros.

El problema es que la release 0.2.0 de OpenWebUI dejó de integrar una versión de LiteLLM. Eso no quiere decir que no se pueda usar, sino que hay que lanzar LiteLLM aparte, a través de un container Docker, por ejemplo.

Lanzamos LiteLLM:

$ docker run -d --name litellm -v $(pwd)/config.yaml:/app/config.yaml -p 4000:4000 -e LITELLM_MASTER_KEY=sk-12345 ghcr.io/berriai/litellm:main-latest --config /app/config.yaml --detailed_debug

Esa orden lanza LiteLLM a la escucha en el puerto 4000, usando config.yaml como fichero de configuración. El fichero config.yaml puede ser algo como este (no te olvides de introducir tus API Keys):

general_settings: {}
litellm_settings: {}
model_list:
  - model_name: claude-3-opus-20240229
    litellm_params:
      api_base: https://api.anthropic.com/v1/messages
      api_key: sk-
      model: claude-3-opus-20240229

  - model_name: gpt-4-turbo # user-facing model alias
    litellm_params: 
      api_base: https://api.openai.com/v1
      api_key: sk-
      model: gpt-4-turbo

  - model_name: gpt-4-vision-preview 
    litellm_params: 
      api_base: https://api.openai.com/v1
      api_key: sk-
      model: gpt-4-vision-preview

  - model_name: gpt-4o 
    litellm_params: 
      api_base: https://api.openai.com/v1
      api_key: sk-
      model: gpt-4o-2024-05-13

  - model_name: gpt-3.5-turbo 
    litellm_params: 
      api_base: https://api.openai.com/v1
      api_key: sk-
      model: gpt-3.5-turbo

  - model_name: gemini-1.5-pro
    litellm_params:
      api_key: AI-
      model: gemini/gemini-1.5-pro

  - model_name: groq/llama3-70b-8192
    litellm_params:
      api_key: gsk_
      model: groq/llama3-70b-8192


router_settings: {}

Ahora, desde OpenWebUI, entramos en Settings/Connections e introducimos http://host.docker.internal:4000/v1 en el campo host y sk-12345 (o la clave que hayas puesto a LiteLLM cuando lo lanzaste vía docker) en el API-Key.